Overview
This article describes steps necessary to deploy a Zultys MX-V virtual machine in Microsoft Azure cloud environment. To deploy Zultys MX-V in Azure cloud, you will need an active Azure subscription.
To purchase a license , please contact your Zultys reseller or send an email to orders@zultys.com. You can also call Zultys using contact information from Zultys Website
Find Zultys MX-V offer in Microsoft Azure Marketplace
- Log in to your Azure portal
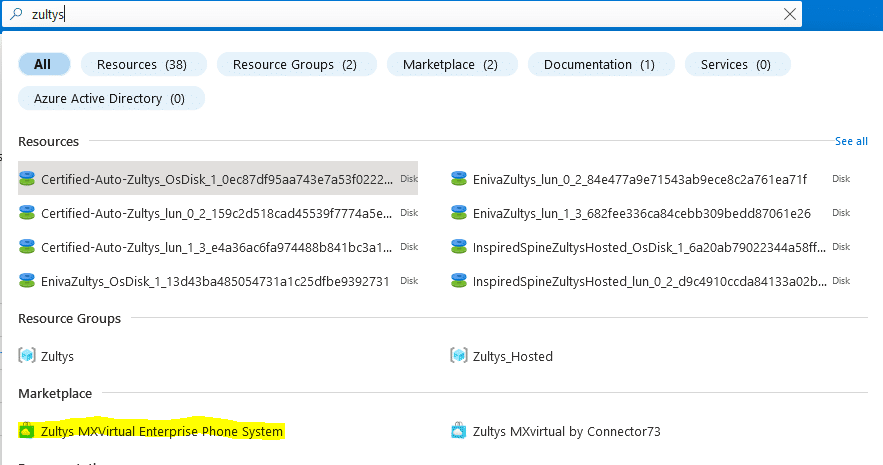
- Search for Zultys in the top search field
- At the moment, you will see 2 results under Marketplace. Ignore the Zultys MXvirtual by Connector73, this release is not supported
- Click on Zultys MXVirtual Enterprise Phone system
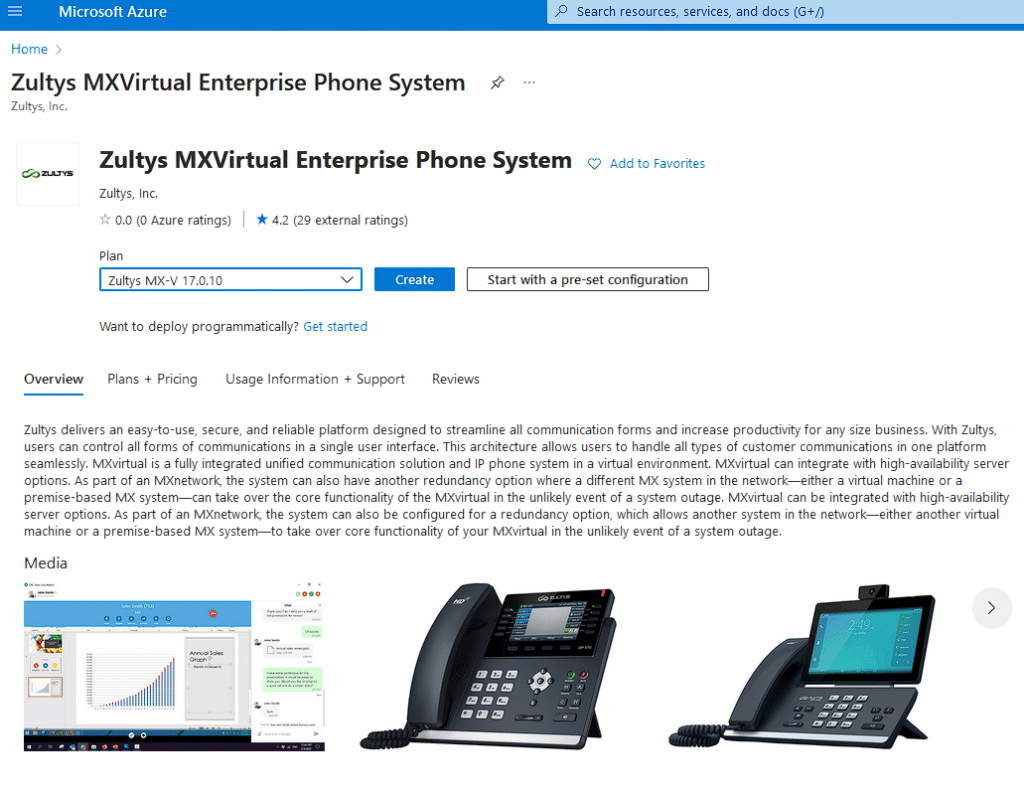
On the next page click “Create” button
Deployment steps
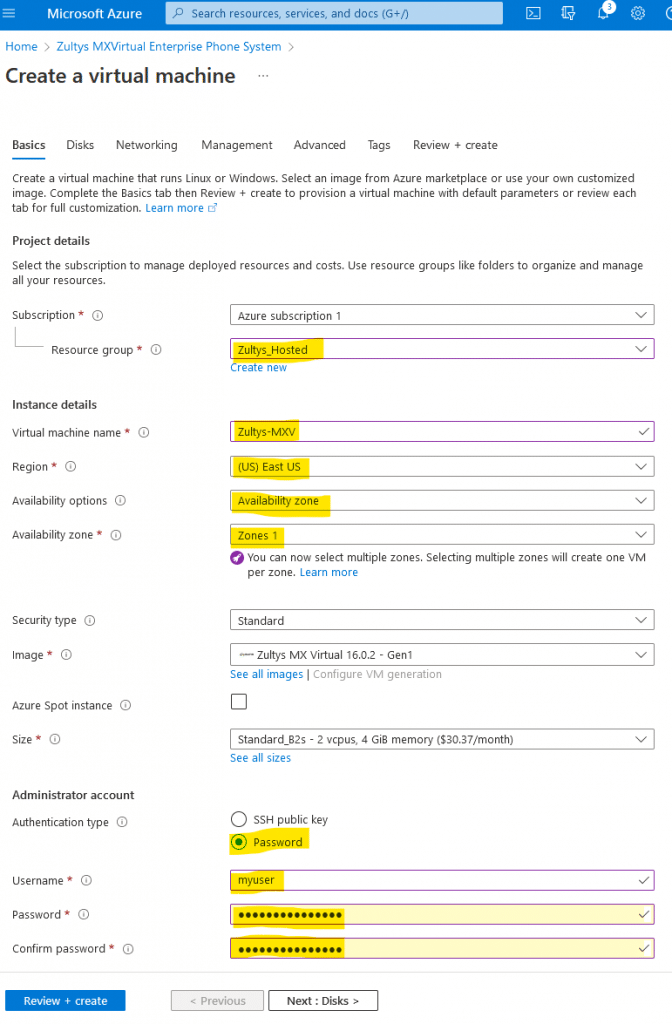
On a “Create a virtual machine” page fill out necessary information using example below.
Basic
- Create a new resource group or select an existing one
- Fill a virtual machine name field
- Select Region – please note that pricing for VM differ from region to region.
- You can leave Availability Zone and Availability Options set to default
- Under Authentication type select “Password”
- Fill a user, password and confirm password fields – these credentials will not be used anywhere in your Zultys MX-V but required by Azure portal.
Click on “Next:Disks > ” Button
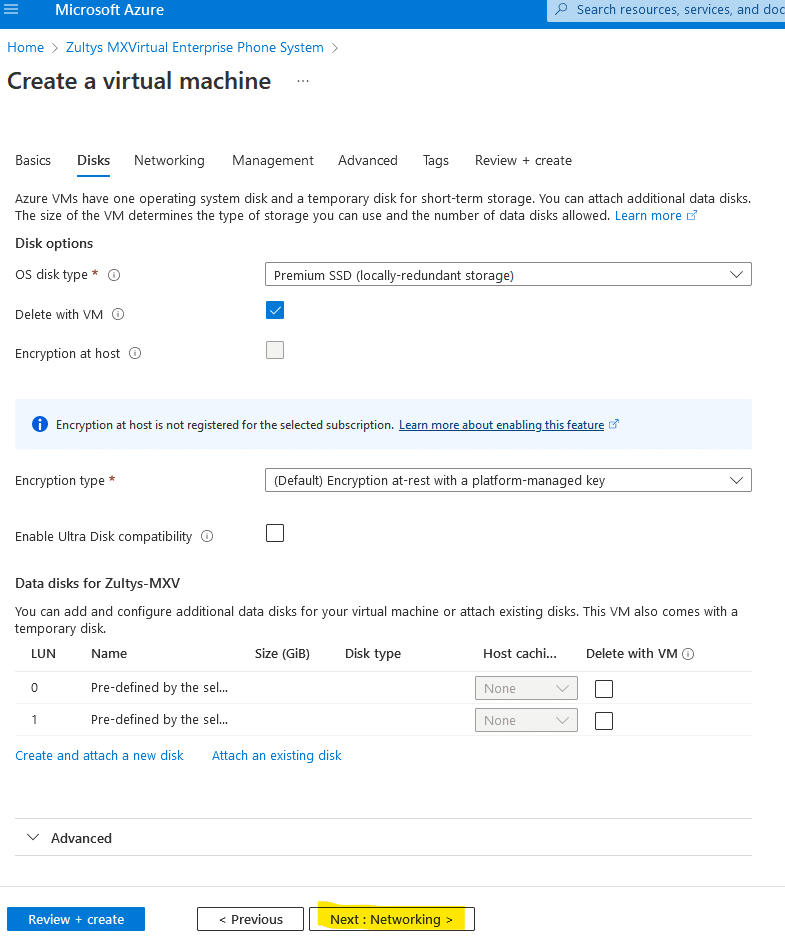
Disks
You don’t need to change anything on this page.
Click on “Next: Networking ” button at the bottom of the page
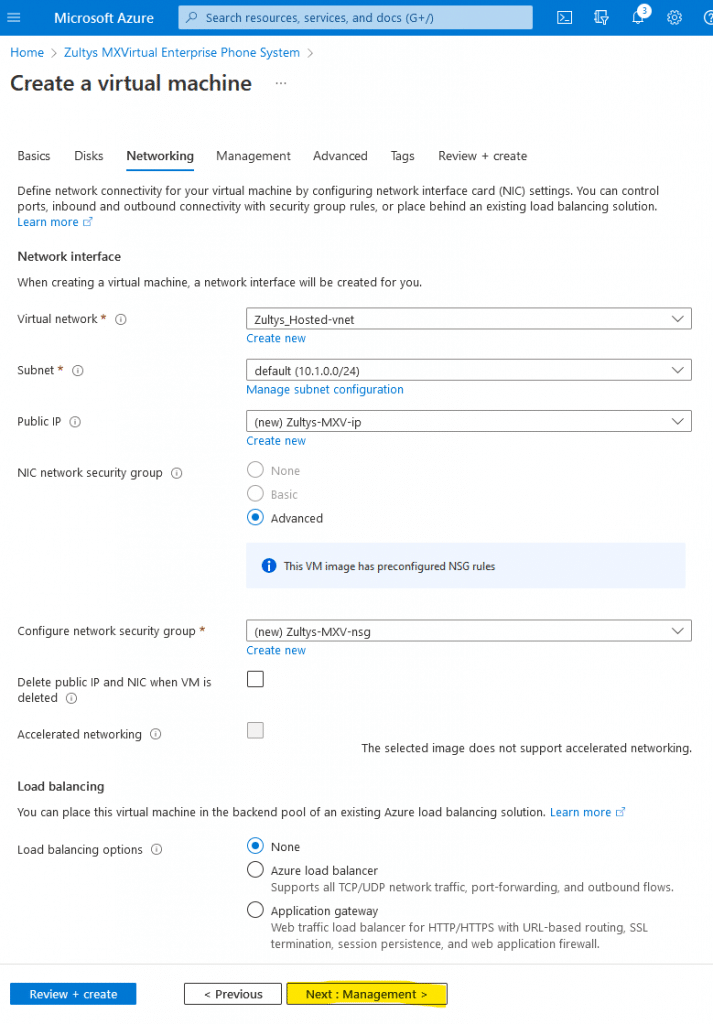
Networking
You can leave all default values here , or create new virtual network and subnet if needed or required.
Please note: Zultys MX-V is using dynamic internal IP addresses in Azure environment, you don’t need to configure a static IP address using console access
Click on “Next: Managment >” button at the bottom of the page
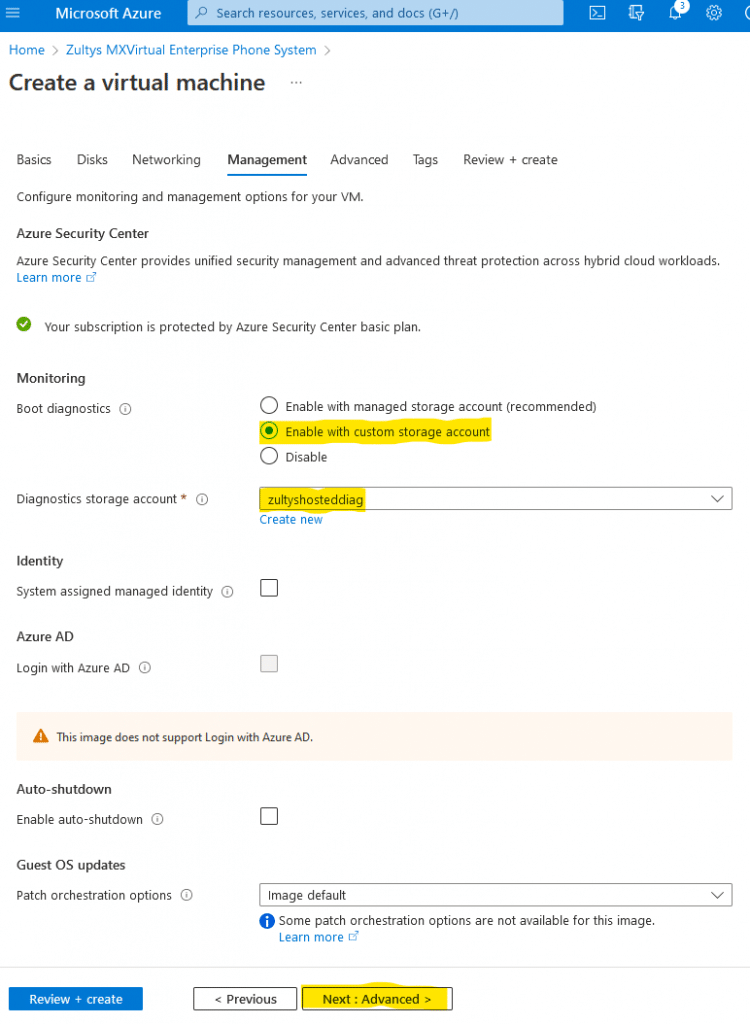
Management
- Enable Boot Diagnostics with custom storage account.
- Select your storage account or create a new one
Click on “Next:Advanced >” button at the bottom of the page
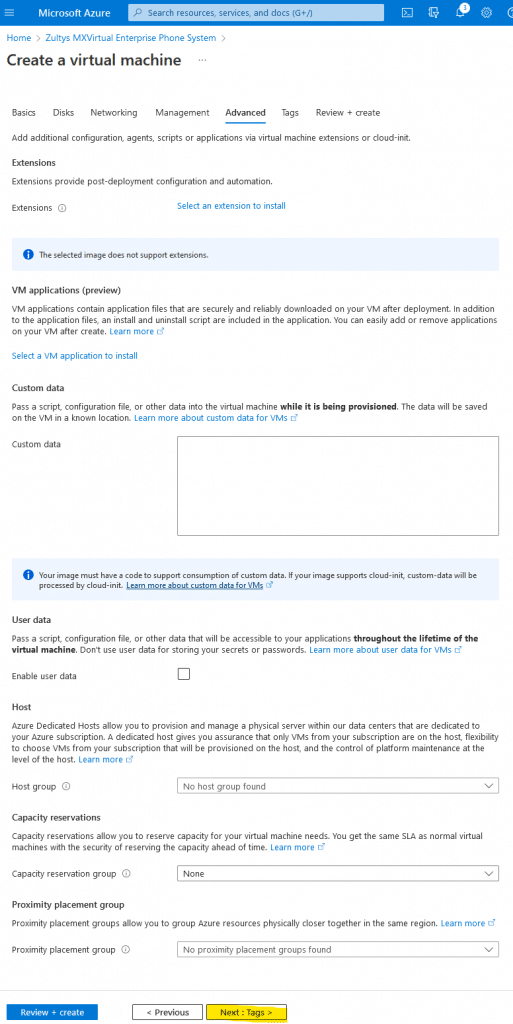
Advanced
You can leave all values here as default. If you have previously configured Host group or Proximity placement group you can select them here.
Otherwise, click on “Next: Tags >” button at the bottom of the page
Tags
Optionally, create any tags you need in your environment.
Click on “Next: Review + create >” button at the bottom of the page

Review + Create
Let Azure run final validation , you will see “Validation passed” on the to of the page
Click on Create button at the bottom of the page

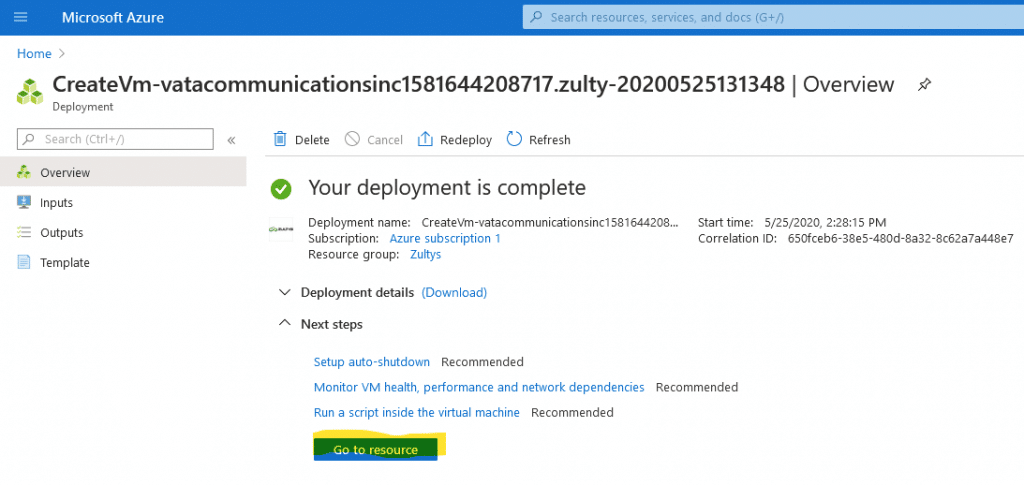
Wait for Azure to finish deployment of the virtual machine
After deployment has been completed, click on “Go to resource” button
Azure post deployment configuration
Networking – inbound ports
RTP inbound port rule was not created automatically due to limitation of Azure publishing interface. You will need to create this rule manually.
Under your virtual machine properties select Networking. On Networking page click on “Add Inbound port rule” button.
Add inbound security rule window will extend from the right. You will need to configure:
- Destination port rages: 21000-24999
- Set protocol to UDP
- Action – Allow
- Priority – 1110
- Name Zultys_RTP_ports
- Click on Add button

Repeat this step for UDP port 33000-35000.
- Destination port rages: 33000-35000
- Set protocol to UDP
- Action – Allow
- Priority – will be added automatically
- Name Zultys_WEBRTC_Ports
- Click on Add button
Note for MX Network users:
If you want to use MX Network and connect one or more system as a group, add TCP Port 7500
- Destination port rages: 7500
- Set protocol to TCP
- Action – Allow
- Priority – 1140
- Name: Zultys_MXNetwork
- Click on Add button
Reserve static external IP address
On Networking page click on NIC Public IP link, ( your IP will be different )

On the Public IP address Page click on Configuration in the list on the left.
Set Assignment to Static and click “Save” on the top of the page

Zultys post deployment configuration
Login to Zultys MX-V with MXAdmin using default user name and password. Use static IP address you’ve configured in a previous step
Important: Change Administrator password immediately, otherwise your system will be compromised
Configure SBC
Access SBC configuration under Provision -> SBC. Under Networks tab, set values for Network address 0.0.0.0 per list below
- Port mapping – checked
- Public IP address – use static public IP address you’ve configured in Azure interface ( same one you’ve used to login to Admin interface )
- External RTP Port Rage Starting – 21000, the ending port range will populate automatically
- Click Apply

On RTP mapping tab check all check boxes and click Apply

Configure SIP settings
Configure SIP settings under Provision -> SIP and RTP per this article
Activate system and install the license
Follow normal Zultys process to activate system and install licenses.
Finishing steps
- Connect your system to Zultys Customer support server under Support -> Customer Support Server -> Connect Now …
- Install latest patches
Your system is ready to be configured according your requirements.
Miscellaneous notes
System performance
Azure based Zultys MX-V was tested with 20 simultaneous calls ( 40 sessions ) using 5 calls bursts, with automatic call recording enabled, auto attendant and group agents. Average system CPU load was around 7% and call MOS score 4.2. Jitter was below 40ms for 95% of calls and below 60 for 99.99% of calls. There were no packet drops during our testing.


